**HY-350N Welding Machine Instructions**
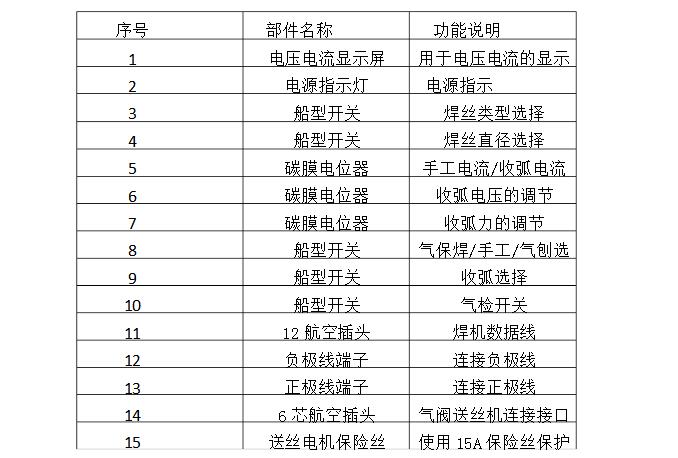
**1. Front Panel Components (See Table 1 for Details)**
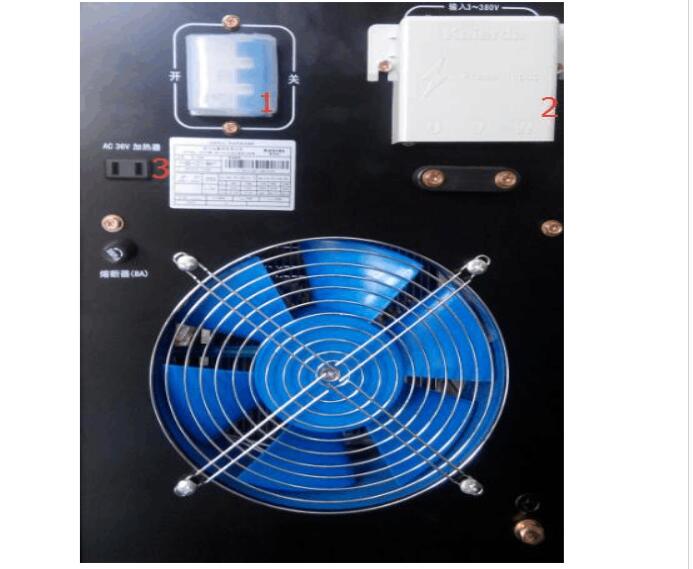
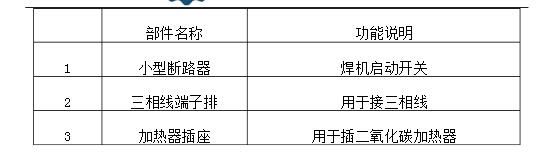 **Wiring:**
- Connect the 380V power line.
- Locate the start switch.
- Ensure the COâ‚‚ heater is properly connected.
**Control Cabinet Manual**
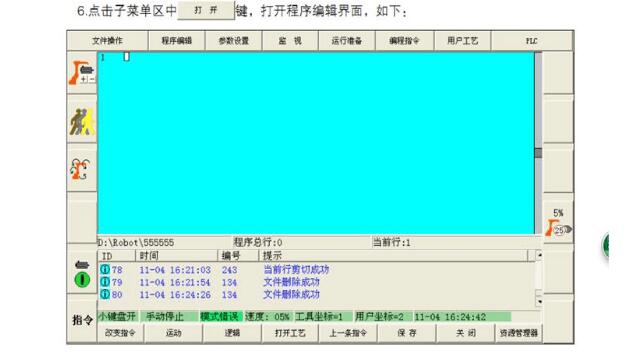
**1. Power On and Off Procedures (Figure 1)**
**Wiring:**
- Connect the 380V power line.
- Locate the start switch.
- Ensure the COâ‚‚ heater is properly connected.
**Control Cabinet Manual**
**1. Power On and Off Procedures (Figure 1)**
Table 1
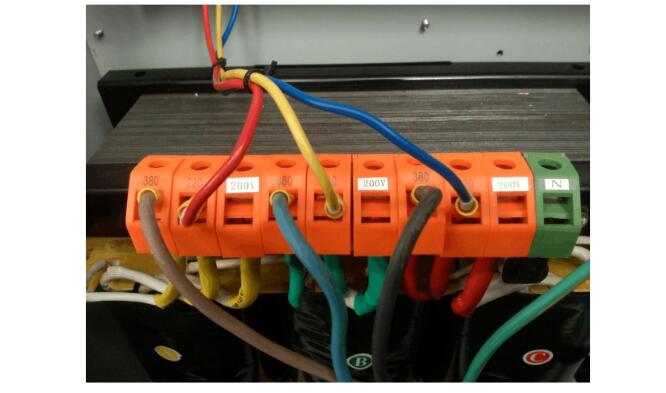
**Wiring:** Connect the 12-pin aviation plug female of the welder to the 12-pin aviation plug male of the control cabinet. Ensure that the positive and negative wires are connected to the 13th positive and 12th negative terminals, as shown in the diagram above. The 6-core aviation plug male from the welder should be connected to the corresponding female connector on the robot. **Gas Inspection:** Set the ship-type switch 10 to position "1" for gas inspection. If the welding gun head is properly supplied with gas, it indicates that the system is functioning correctly. **Welding Settings:** - Set ship-type switch 3 to "0" for solid core wire. - Set ship-type switch 4 to "0" for 1.0mm welding wire. - Set ship-type switch 8 to "1" for gas shielded welding mode. - Set ship-type switch 9 to "1" for arc welding. - Set ship-type switch 10 to "0" for arc welding and also for welding file settings. **2. Rear Panel Components**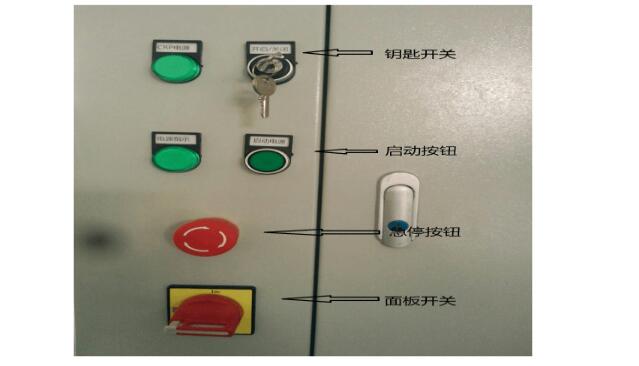


Dongguan City Yuanyue Electronics Co.Ltd , https://www.yyeconn.com